

Key Takeaways
Why the Squat Is Worth Learning First
The squat is what exercise scientists call a fundamental movement pattern - a motion your body already performs dozens of times daily when you sit down, stand up, or pick something off a low shelf. Training this pattern with intentional form builds lower-body strength, improves hip and ankle mobility, and strengthens the muscles that stabilize your spine and knees.
According to the American College of Sports Medicine (ACSM), compound lower-body movements like the squat engage multiple large muscle groups simultaneously - primarily the quadriceps, hamstrings, glutes, and core - making them highly efficient for general fitness. For beginners, the bodyweight version removes the complexity of added load, allowing you to focus entirely on movement quality before progressing.
If you're part way through building an initial routine, the squat fits naturally into any beginner program. See our four-week beginner movement plan for context on how to incorporate it week by week. And if you're weighing home training against gym equipment, our bodyweight vs. gym machines guide can help you decide on the right environment.
What you will need
Step-by-Step: How to Perform the Squat
Work through the steps below at a slow, controlled pace. Read each step fully before attempting it. If you have access to a mirror, use it - visual feedback is one of the most effective tools for self-correcting form as a beginner.
Flat-soled shoes or bare feet
Provides a stable base so your feet can feel the floor and distribute weight evenly during the squat.
Sturdy chair
Used as a depth guide or safety support for beginners learning to control the descent.
Full-length mirror or phone camera
Allows you to observe your own form in real time to catch alignment errors early.
Set Your Foot Position
Stand with your feet roughly shoulder-width apart. Point your toes slightly outward - somewhere between 15 and 30 degrees works for most people. This stance allows your hips to move freely as you descend without forcing your knees into an awkward angle.
Press all four corners of each foot firmly into the floor: the heel, the ball of the foot under your big toe, and the ball under your little toe. Think of gripping the floor lightly. This creates a stable foundation before you move.
Align Your Spine and Brace Your Core
Stand tall. Roll your shoulders back and down away from your ears. Keep your chest open - not puffed out, just upright. Your spine should be in its natural neutral position, which means a slight inward curve at the lower back, not rounded or hyperextended.
Take a breath into your belly and gently brace your abdominal muscles - imagine someone is about to lightly poke your stomach. This core tension protects your lumbar spine throughout the squat. Maintain this brace from setup through completion of each rep.
Initiate the Descent
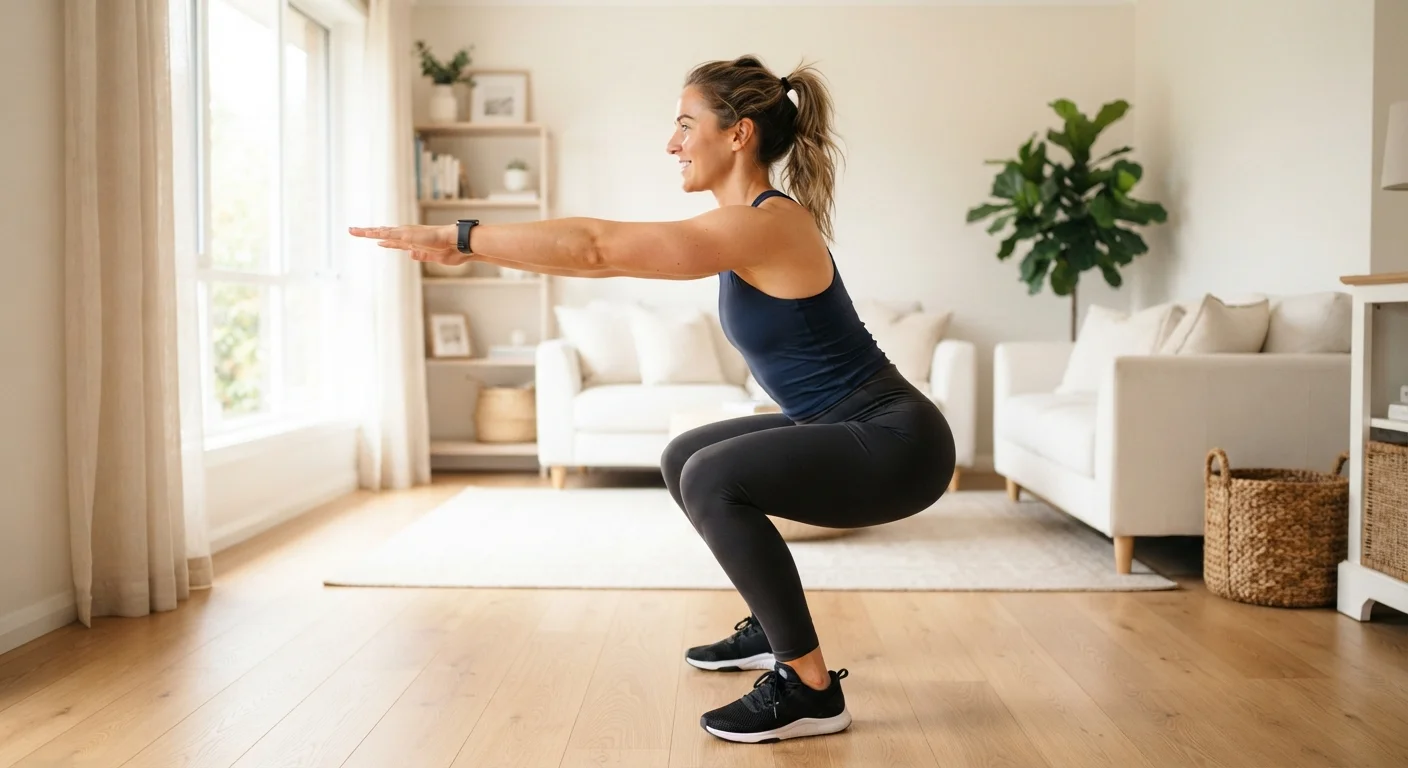
Extend your arms straight out in front of you at shoulder height for counterbalance. Begin the movement by pushing your hips back and down simultaneously - think of sitting back into a chair that is slightly behind you. This hip-back initiation keeps your weight balanced over your midfoot rather than tipping forward onto your toes.
As you descend, your torso will naturally tilt slightly forward. A small forward lean is normal and acceptable; the goal is to keep your chest as upright as your mobility currently allows.
Check Your Knee Tracking
As you lower down, check that your knees are traveling in the same direction as your toes - not caving inward toward each other. This alignment protects the knee joint from lateral shear forces. If your knees do cave, lightly press them outward using your hip muscles (the glutes) to correct the path.
Your knee can travel slightly past your toes - this is biomechanically normal, contrary to older guidance. What matters most is that the knee tracks over the toe and doesn't twist inward.
Reach Your Depth and Pause
Lower yourself until your thighs are roughly parallel to the floor - or as far as your current mobility comfortably allows without losing the neutral spine position. For many beginners, a shallower depth at first is completely appropriate and safe. Depth improves naturally over weeks of practice as hip and ankle mobility increases.
Pause briefly at the bottom of the movement. This pause removes momentum from the equation and ensures the muscles - not gravity - control the position.
Drive Back Up to Standing
Press through your entire foot - heel and toes equally - to stand back up. Think about pushing the floor away from you. Engage your glutes (the muscles in your backside) actively as you rise. Keep your core braced, chest tall, and knees tracking over your toes throughout the return phase.
Exhale steadily as you stand. Fully extend your hips at the top - stand tall, squeeze your glutes lightly - before beginning the next repetition. This completes one full bodyweight squat.
Use a Chair as a Depth Guide
Place a sturdy chair behind you when you're first learning. Lower yourself until you lightly touch the seat, then stand back up. This gives you a reliable depth target and removes the fear of falling, making it easier to build confidence in the movement pattern.
Don't Push Through Sharp Pain
Mild muscle effort or light discomfort is normal when learning a new movement. Sharp, stabbing, or joint-specific pain is not. Stop immediately if you feel anything beyond mild muscular exertion, and consult a healthcare professional before continuing.
Consult a Professional Before Starting
If you have a history of knee, hip, or lower-back pain - or any chronic health condition - speak with a qualified healthcare provider or certified physical therapist before adding squats to your routine. This article provides general educational guidance, not personal medical advice. Pain during the movement is a signal to stop.
This article is for general informational and educational purposes only and does not constitute medical advice. Always consult a qualified healthcare professional before beginning a new exercise program, particularly if you have any existing health conditions or injuries.
Common Form Mistakes and How to Correct Them
Even with careful instructions, a few errors appear frequently in beginners. Knowing what to watch for helps you self-correct early before habits form.
- Heels rising off the floor: Usually a sign of limited ankle mobility. Try elevating your heels slightly on a folded mat or focusing on keeping weight through the heel consciously. Ankle mobility improves over time with consistent practice.
- Chest collapsing forward excessively: Often caused by tight hips pulling the torso down. Keep your arms extended in front of you for counterbalance and focus on sitting back rather than forward.
- Knees caving inward (valgus collapse): Drive knees out using glute activation. Cue yourself to "spread the floor" with your feet without actually moving them - this activates the muscles that stabilize knee tracking.
- Lower back rounding at depth: Reduce your squat depth until you can maintain a neutral spine. Mobility and depth will improve gradually - there is no value in rushing it.
For a broader understanding of how movement skills fit into your overall fitness foundation, explore our comprehensive beginner fitness guide.